
This bread can be made using any cup for cup gluten free flour blend. Or a blend that contains xanthan gum and is recommended for bread. I particularly like to use a blend called Better Batter. It is my most favorite flour blend, the best I have used. However the next recommended flour blends would be GFJules or Cup4Cup or President's Choice GF Flour found in stores carrying the President's choice brand. Or a home made blend made from rice flour as the base will work. Rice flour is the one used in the sourdough starter so it is recommended.
If you have made gluten free bread before then you are familiar with the trickiness of dealing with a wet batter or dough. When it comes to sourdough the batter becomes even more wet! Sourdough needs a higher hydration ratio of liquid in the batter in order to get a good rise. If your batter is too dry your bread will not rise or barely rise and will crumble.

My preference for making sourdough bread is to use a food processor or a stand mixer with a paddle. A dough hook is not recommended because the batter is too wet to hook and knead properly. You can however if you are determined mix the dough by hand. Just make sure you are thorough, get your hands in the batter and make sure it is well blended or the xanthan gum will not work as it should as the binder.
I hate having dough all up to my elbows and under my nails so I prefer to use an appliance!
In order to get a proper rise you will need to have an already happy and bubbly rice sourdough starter brewing. If you have not already started one you can download the instructions here. It took my sourdough about 7 days in order to be ready to make bread. 7 days of feeding the starter flour and water every 12 hours. After 7 days, you should

I had the same results using a cold starter and a just fed starter. This typically though requires baking your bread in the morning or in the evening around feeding time unless you refrigerate your starter.
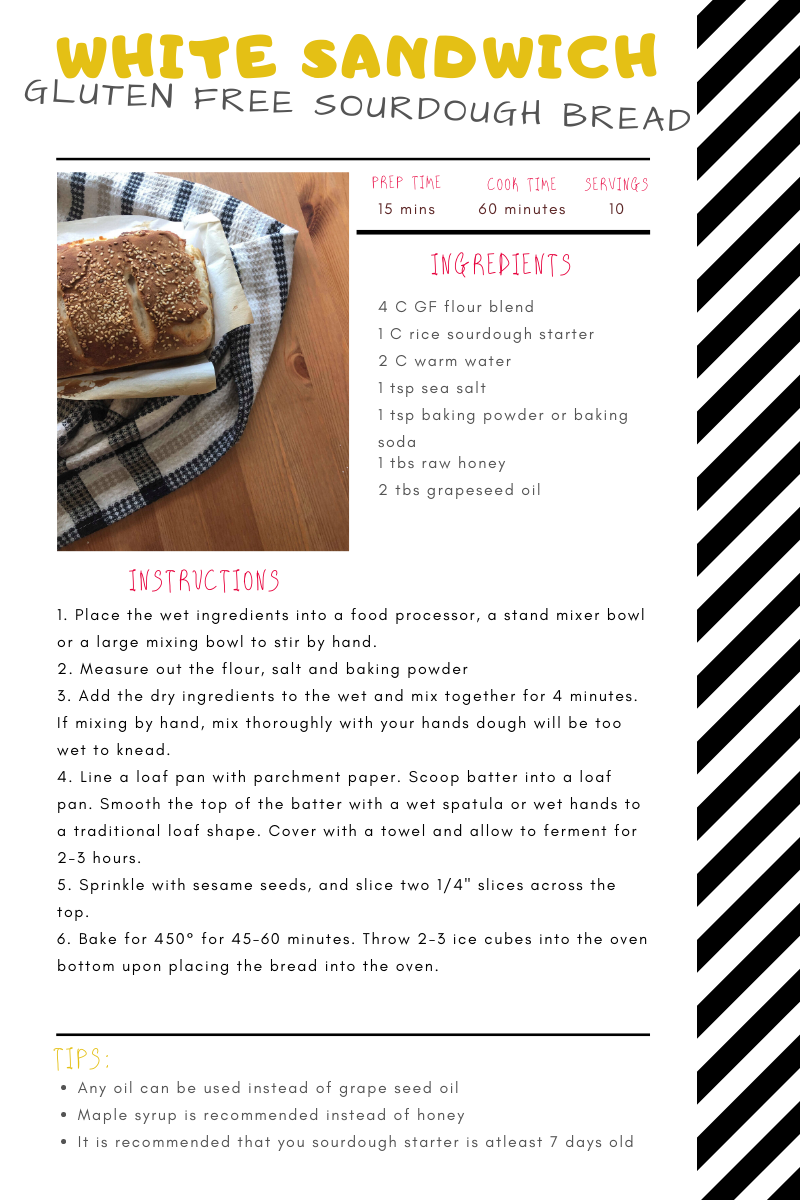
After I mixed the batter together thoroughly I shaped the batter in my loaf pan with a wet spatula. I fill a bowl with water and I dip the spatula into the water as necessary to smooth out the loaf completely and create the traditional rounded domed shape. At this time while the top of the batter was still wet, I sprinkled with toasted sesame seeds. Mostly because I cannot resist sprinkling bread with something. It just looks so bare and lonely without anything added to it. You could use any combination of seeds, everything bagel spice, oats, or corn starch.
This is how the batter looked before the rise. It filled the pan half way. Cover the batter with a towel and place in a warm area to ferment and rise for 2-3 hours. I like to keep my house cool. And with sourdough you want to avoid any drafts or anything that can dry out the dough, so simply placing the batter onto my furnace vent to rise is out of the question. I actually have a proof setting on my oven. So I use that, but you can simply place the bread into an oven with the door closed and the light on.

The loaf rose until just over the top of the pan. High enough it was ready to slice.
The slices are important, they actually help the loaf rise straight up instead of outwards or instead of cracking on the side somewhere. After all this is a sandwich bread so we wanted the highest rise we could possibly get without over proofing.
Use a wet knife to cut the slices delicately but at least 1/4" deep. After that, allow the bread to continue proofing while you preheat the oven.
Once the oven is hot and ready you will need to place some ice cubs onto the oven floor directly. Alternatively you can place a small dish of hot water on a rack below the bread. This creates moisture that helps with the rise, but also helps to create a sturdy crust. You can leave this step out but your rise may be noticeably less.
If the bread starts to brown or gets too dark for your liking you can tent the pan with tinfoil.
As soon as the bread is baked, remove it from the pan by pulling on the parchment paper and lifting it out onto a cooling rack. Remove the parchment paper or it will create condensation and will make the bread wet on the bottom and soften the crust. Allow to cool completely before slicing or the bread will seem gummy.
Like most gluten free breads they are best eaten the same day or within 2-3 days of baking. Each day the bread will become dryer and benefits from being toasted. After day 3 if we haven't eaten the bread I move it to the freezer already sliced and bagged. However day 1 you can eat an amazing sandwich straight away without having to toast the bread at all. It holds together beautifully and did not crumble. I hope you enjoy this simple sandwich bread as much as I did with the ease of using your favorite gluten free flour blend already on hand!
Comments
Post a Comment